Modifying Printer Configurations
This topic describes how to modify your printer configurations.
- On the ShipExec Management Studio home page, click Companies.
- From the Companies page, do one of the following:
- To modify printer configurations at the company level, click the
 icon for the company whose printer configurations you want to modify.
- To modify printer configurations at the site level, click the icon for the company, then click the Sites tab, and then click the site for which you want to modify printer configurations.
- To modify printer configurations at the company level, click the
- From the Printing tab, click Printer Configurations. The Add Printer Configuration page displays.
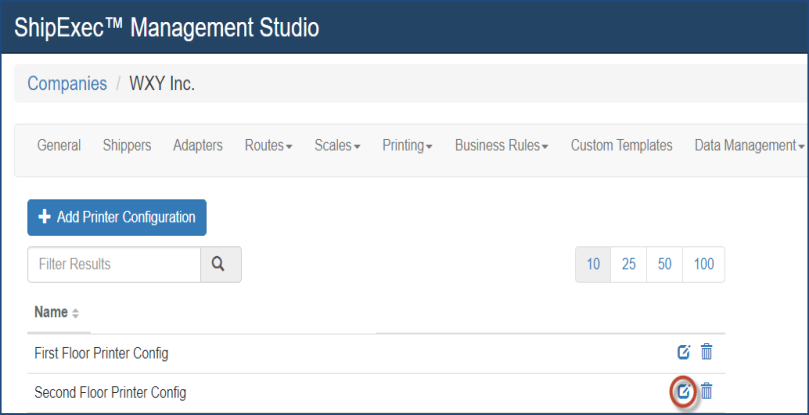
- Click the
 icon to select the printer configuration you want to modify. The Edit Printer Configuration dialog box displays.
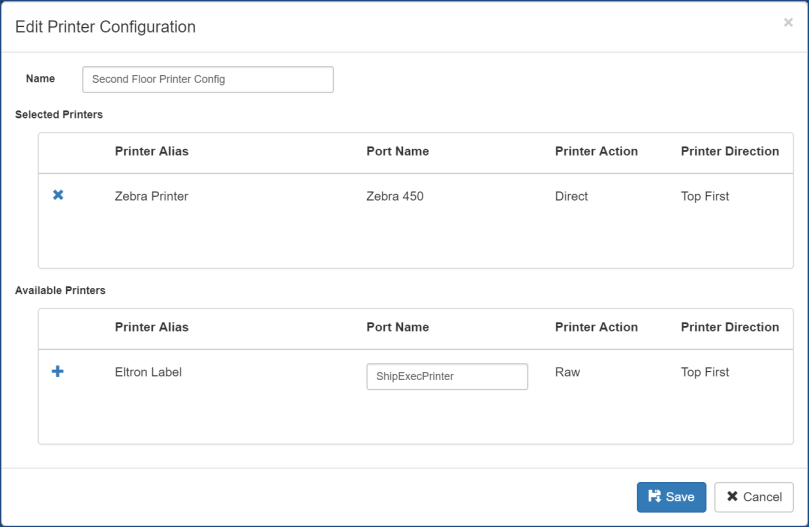
- Do any of the following:
- To add printers with a Direct or Image Printer Action, click the plus (+) sign to the left of the Printer Alias to move the printer from Available Printers to the Selected Printers panel. (Direct means that you are printing directly from the server. For this option, you must enter the server printer name.)
- To add printers with a Raw Printer Action, type the local printer name in the Port Name box, then click the plus (+) sign to move the printer from Available Printers to the Selected Printers panel.
- To remove a printer from the Selected Printers panel, click the (x) sign.
- Click Save.
Related Topics